Rat-proofing a Lubbock home is a structured process that covers the roof line and the foundation perimeter with the right materials in the right sequence. This guide walks through the full program step by step, with specific material recommendations for West Texas conditions and the Lubbock construction profile.
Before you start: confirm no active infestation.
Rat-proofing should be done either before an infestation (preventive) or after a treatment program has been verified complete. Sealing entry points with active animals inside creates a trapped-animal situation. If you suspect current activity, inspect the attic from the access opening for fresh droppings (dark, pliable) and check the foundation perimeter for fresh burrow openings before beginning any sealing work. If you find evidence of current activity, treat first.
Step 1: Roof-line inspection.
Walk the exterior with a ladder, inspecting the full roof line at close range. What to find and map: soffit vents with damaged, missing, or pulled-away screening; the junction between fascia board and roof sheathing where gaps have developed; gable vents with cracked or missing screening; and any pipe or conduit penetrations through the roof where the boot or flashing doesn't fully close the circumference gap. Also inspect from the attic interior with a flashlight, looking for daylight visible through the roof line — this shows gaps not visible from the exterior.
Step 2: Soffit and gable vent exclusion.
Cut hardware cloth to fit inside or behind each vent opening. Material: Galvanized hardware cloth, 1/4-inch mesh, rated for exterior use. Install with stainless or galvanized self-tapping screws through the mesh into the vent frame, or with construction adhesive on clean surfaces. The mesh should cover the full vent opening without blocking airflow. Replace any existing plastic or fiberglass screening with hardware cloth — don't install over the top of failing screening.
Step 3: Fascia-gap blocking.
The gap between the fascia board and the roof sheathing where wood has shrunk is closed with: aluminum or galvanized sheet metal cut to the gap width and screwed to both surfaces (for gaps 1/2 inch or larger), or hardware cloth stapled across the gap and sealed with exterior-grade caulk (for smaller gaps). For gaps in the 1/4 to 1/2 inch range, foam-and-mesh is appropriate if the mesh is properly secured.
Step 4: Pipe chase and penetration sealing at the roof.
Water heater flue, dryer vent boot, and plumbing vent pipe penetrations through the roof often have a gap around the pipe circumference. Fill with foam backer rod first, then apply exterior sealant. For gaps larger than 3/4 inch, back with hardware cloth before sealing.
Step 5: Foundation-level inspection.
Walk the full foundation exterior at ground level. Map every weep hole, pipe penetration, foundation crack, and drain cover gap. This is also where Norway rat burrow openings would appear if Norway rats are present.
Step 6: Weep-hole sealing.
Install copper mesh in every weep hole. Press firmly to fill the gap without compressing so tightly that it blocks moisture drainage. Why copper: Doesn't rust, doesn't compress, can't be chewed, expands and contracts with the brick rather than cracking away from it. For a standard Lubbock home with 50–70 weep holes, this step takes 1.5–2 hours to complete properly.
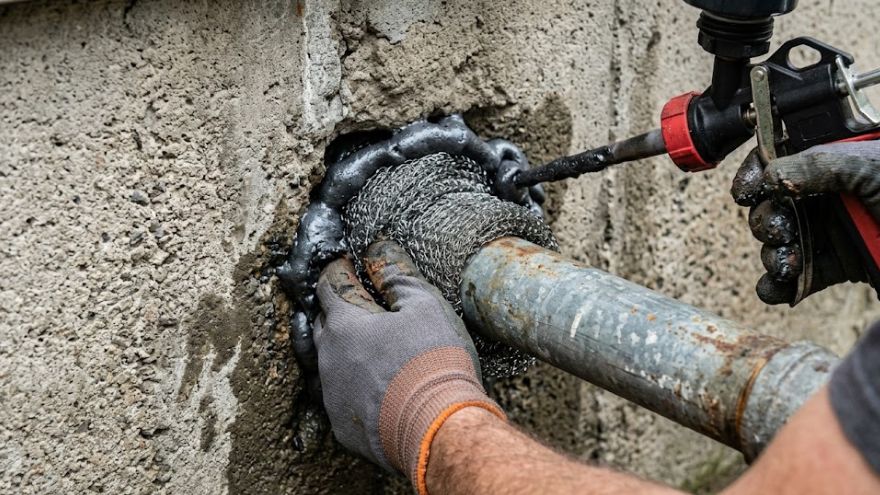
Step 7: Utility penetration sealing (foundation level).
All water supply, drain, gas, and electrical penetrations through the exterior wall at foundation level. Fill smaller gaps with foam-and-mesh. For larger gaps or those near the foundation-grade interface, use copper mesh fill before applying sealant to prevent moisture issues from a foam-only seal.
Step 8: Door sweep replacement.
Garage door bottom seal and all exterior door sweeps. Close each door and check for light gaps along the bottom. Replace any sweep where light is visible.
Step 9: Vegetation management.
Trim any tree branches that overhang or touch the roof line within 6 feet. Rat-proof a property that still has a branch touching the roof is an incomplete program. The branch is the access route from the tree canopy to the roof surface.
Step 10: Documentation.
Photograph every sealed location before and after. This creates a reference record for future inspections and for any warranty or reinspection needs. See our rat proofing service for professional execution of all ten steps with before-and-after documentation provided at completion.